Click here to see how to train up on agent and team assignment
You can create a team of agents if you want those agents to all be assigned to particular issues based on specific postcodes, properties or landlords.
To add a new team, simply click on '+ Add team' on the top left hand corner of the screen.

When you click to add a new team, you will be taken to the following screen. You will need to add a team name; the description is optional. Please keep 'Is deleted/inactive' as 'No' to create an active team. Remember to press 'Save'.

Once you have pressed 'Save', the team will be created and you will remain on the same page and be able to add members to the team. You will be able to see that the team has no current members until these have been added. You will also see that a new tab will have been added called 'Assignments':

To add a team member, you will need to begin typing an existing Agent's name or email address, select them from the drop down and then click 'Add':


Once you have your members added to the team, you will want to assign properties, landlords, or postcodes to the team. You can list either just the outcode (the beginning of the postcode, for example, SW4) or the entire postcode that you would like to assign to this team.
To Assign Postcodes to Teams
Postcode assignments are added by clicking on the 'Assignments' tab and scrolling down to 'Postcode assignment'. Here, you can add a list of postcodes that will be assigned to this particular team.
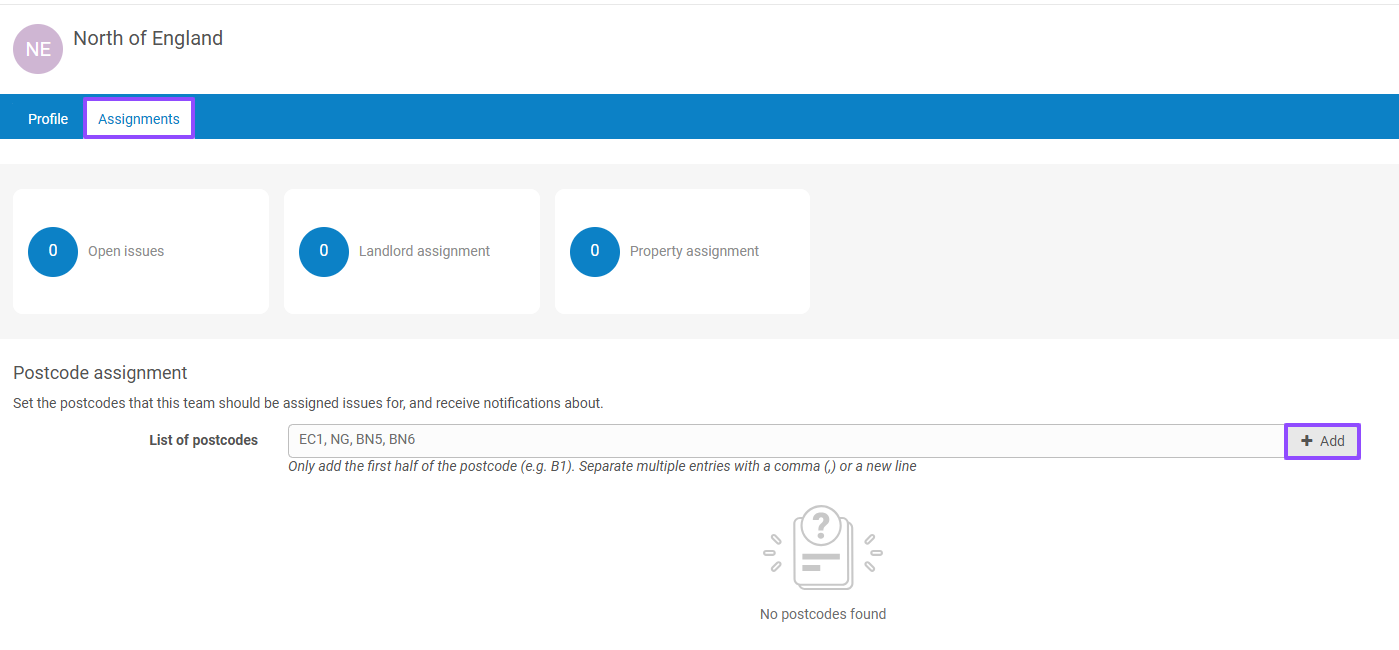
Entries should be separated either by a comma or added on separate lines. Once added, please press 'Add'.

As you add postcodes, they will populate underneath the 'Add' button and the locations will be added by the system:

The postcodes will remain in the top box until you remove them:
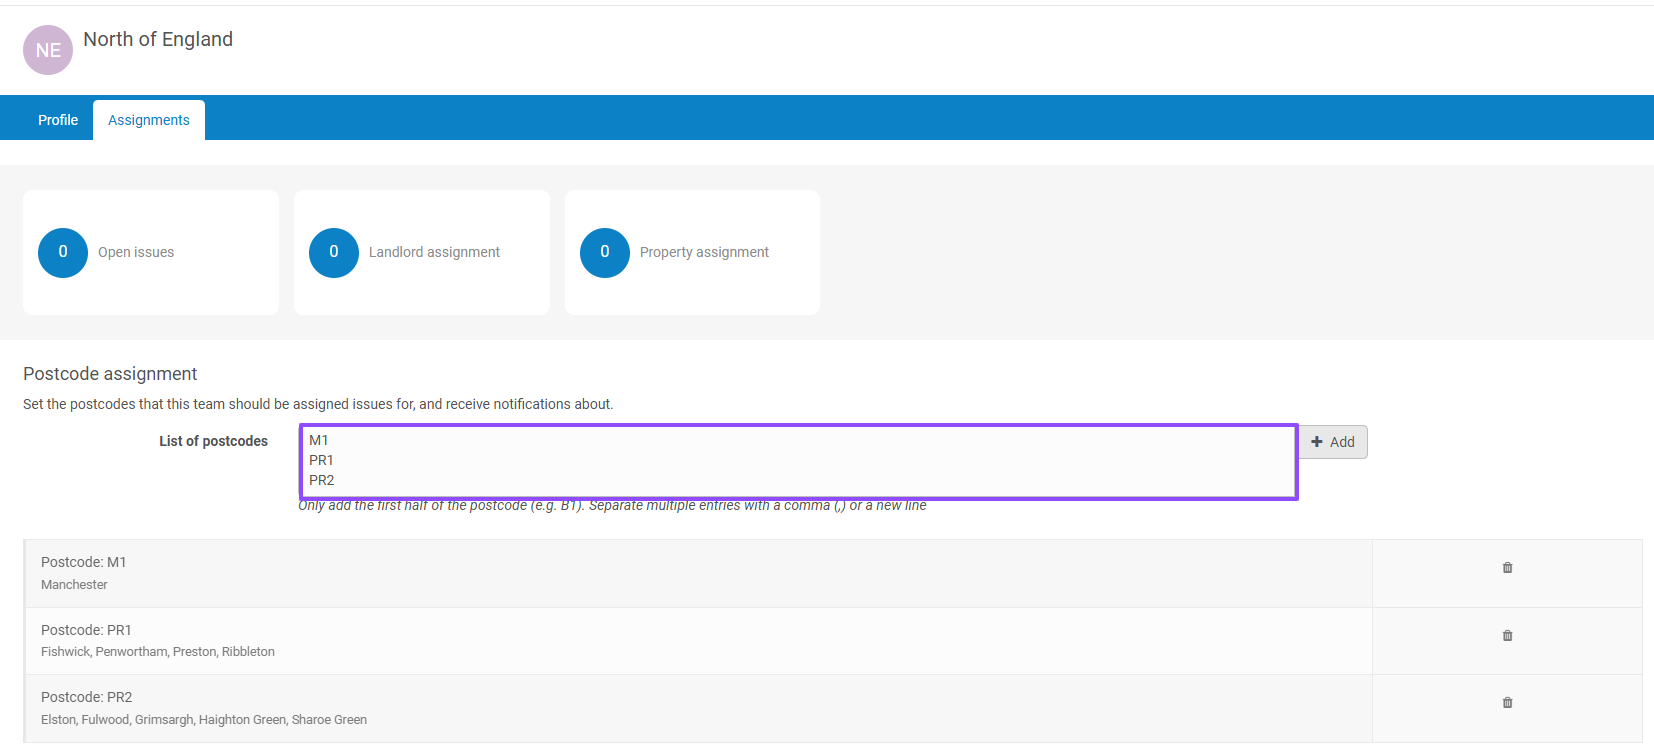
Any issues which are reported against those postcodes will then be auto-assigned to that team going forward.
To Remove Postcodes Assigned to a Team
If you no longer wish for a certain postcode to be assigned to a team, you can easily remove it.
Click on People > Teams and select the team from which you want to remove a postcode assignment. Once in the team, click on the 'Issues assignments' tab and scroll down to 'Postcode assignment'.
You will find the postcodes listed here, and to remove a postcode assignment, simply click on the delete icon on the right-hand side of the postcode location:
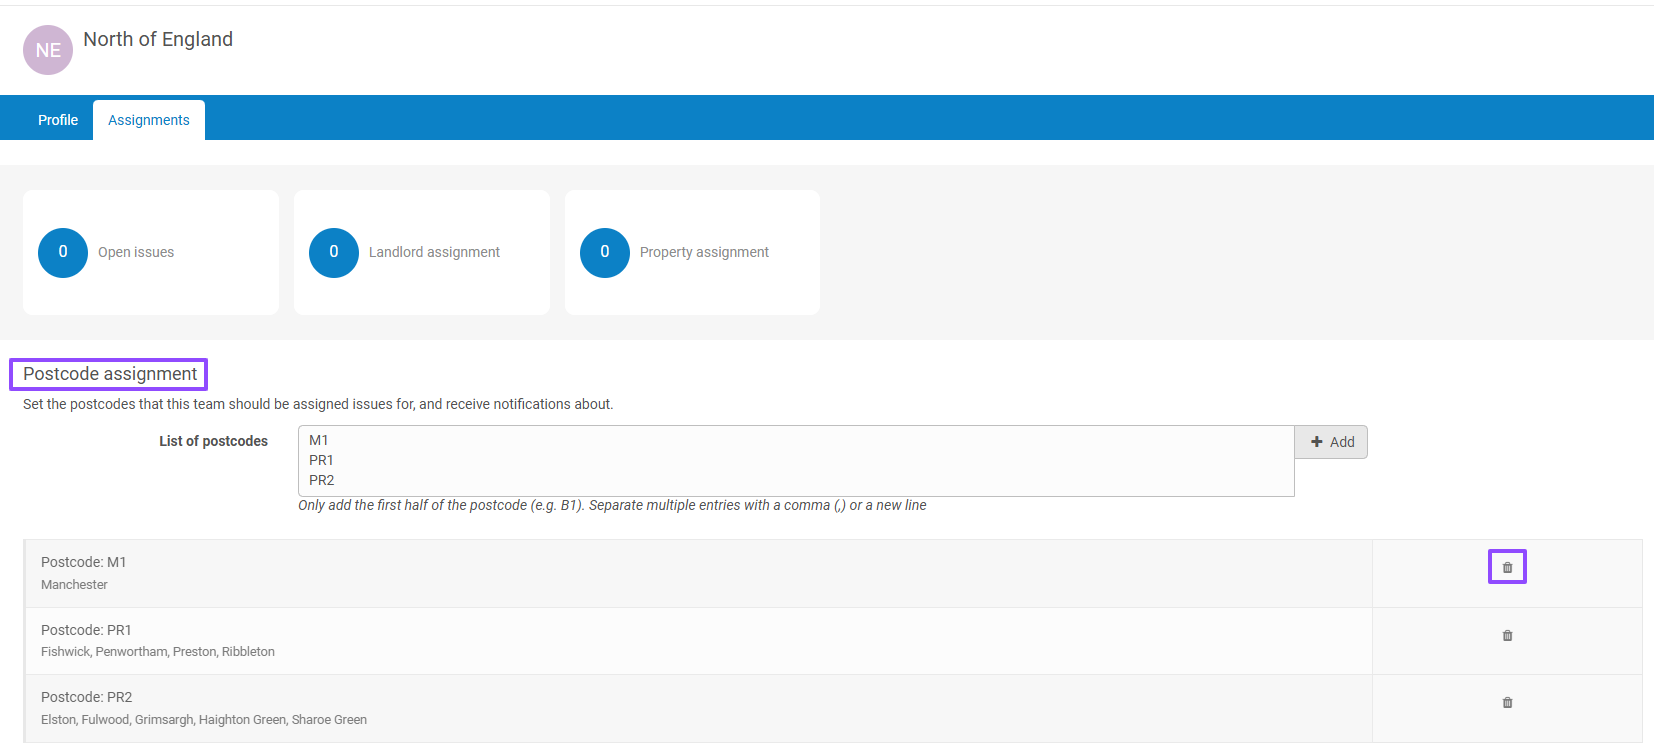
That postcode will then be removed from the list, and issues reported against properties at that postcode will no longer be automatically assigned to that team.
To Assign Properties to Teams
Property assignments are added by clicking on 'Properties' on the left-hand side menu bar and then clicking into the property you would like to assign to a team. You will want to remain within the 'Detail' tab and scroll down to 'Issue assignment', where you can assign an agent or a team to a property.

You will want to start typing the team name, choose that team from the drop-down, and then press 'Save'.

Once you have pressed 'Save,' that property will be assigned to that team. Any issues reported against that property will then be auto-assigned to that team going forward.
If you go back into People > Teams and click into the team and go to the 'assignments' tab, you will see 'Property assignment'. This will show the number of properties that have been set up under this team.
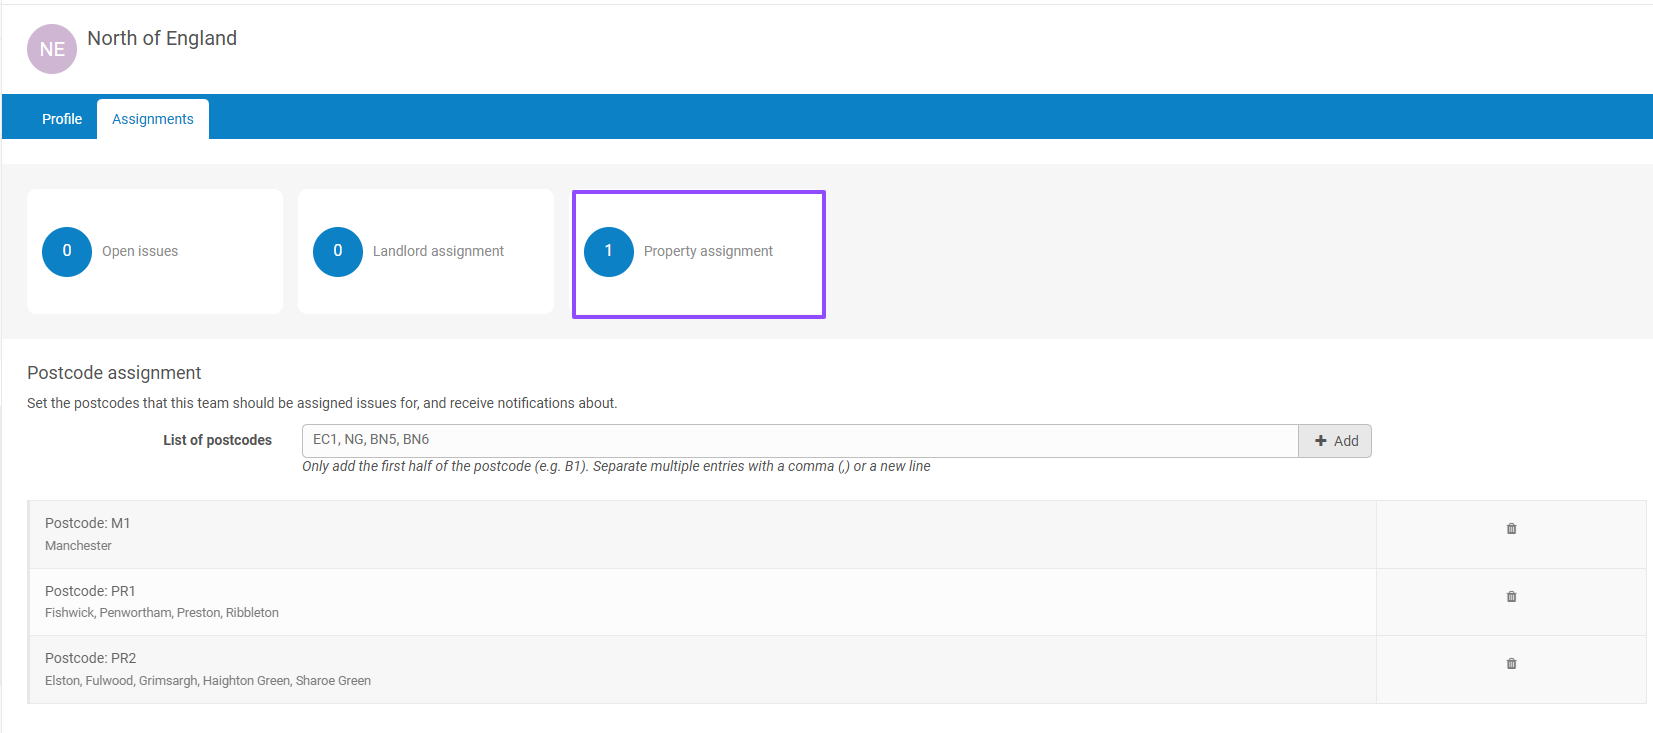
Click into the 'Property Assignment' tab, and all the properties with the team you have selected and assigned to the property will appear here.

To Remove Properties Assigned to a Team
If you no longer wish for a certain property to be assigned to a team you can easily remove this.
Click on 'Properties' and search for the property you wish to remove from being assigned to a team. Once you are in that property, remain within the 'Detail' tab and scroll down to 'Issue assignment'. Here you will see the team name next to where it says 'Agent/Team'. Simply click on the 'x' on the right-hand side of the team name and then press 'Save':

If you then click on People > Teams and choose the desired team, that property will no longer appear in the list under 'Property assignments'.
Any issues which are reported against that property will no longer be auto-assigned to that team going forward.
To Assign Landlords to Teams
Landlord assignments are added by clicking on People > Landlords, and then clicking into the Landlord which you wish to assign to a team. You will want to remain within the 'Profile' tab of the Landlord and then scroll down, where you can open up 'Issue assignment'. This is where you will be able to add either team or agent assignment for this Landlord:

You will want to start typing the team name, choose the team from the drop-down down and then press 'Save':

Once you have pressed 'Save,' that Landlord will be assigned to that team. Going forward, any issues reported against any properties associated with that Landlord will be auto-assigned to that team.
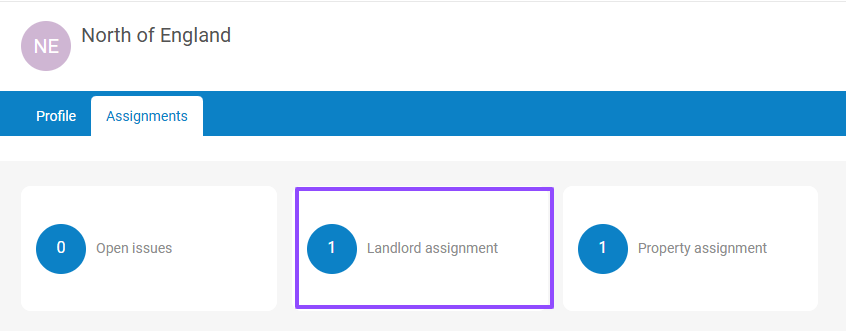
If you go back into People > Teams and click into the team and go to the 'Assignments' tab, you will see the Landlord added under 'Landlord assignments':

To Remove Landlords Assigned to a Team
If you no longer wish for a certain property to be assigned to a team you can easily remove this.
Click on 'People' > 'Landlords' and search for the Landlord you wish to remove from being assigned to a team. Once you are in that Landlord, remain within the 'Profile' tab, scroll down and open up 'Issue assignment'. Here you will see the team name next to where it says 'Agent/Team'. Simply click on the 'x' on the right-hand side of the team name and then press 'Save':

If you then click on People > Teams and choose the desired team, that Landlord will no longer appear in the list under 'Landlord assignments'.
Any issues reported against properties associated with that Landlord will no longer be automatically assigned to that team going forward.
Was this article helpful?
That’s Great!
Thank you for your feedback
Sorry! We couldn't be helpful
Thank you for your feedback
Feedback sent
We appreciate your effort and will try to fix the article